
MANDATORY DISCLAIMER! What I describe on this page is dangerous and stupid. It involves chemicals that can and have killed people, things that probably void your printer's warranty, and working with hot metal. I personally received a three inch long burn as a result of this project that is still healing after 6 weeks. I am not responsible nor liable for anything you do as a result of reading this page.
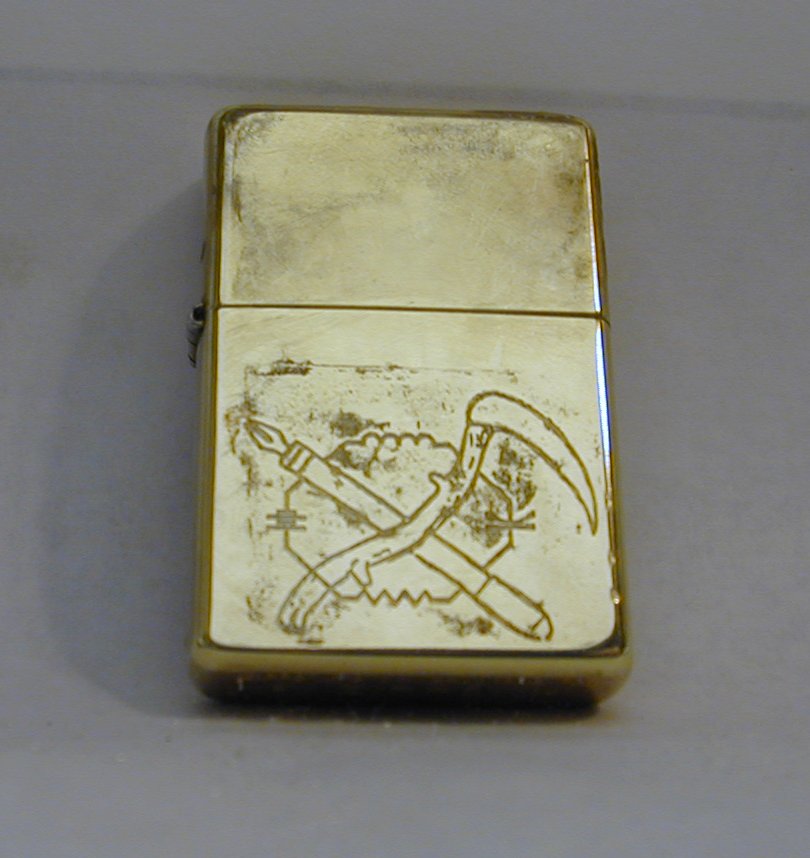
The story behind the scythe and pen can be found on the fourm. In short, the pen equals knowledge, the scythe equals freedom, and the circuit is how I make my trade, and my major shot at making a mark on the world. It was never meant to be just an avatar, but more an attempt to create a personal heraldic charge in case coats-of-arms become popular again. This site has it, it's my tag when I game, and if I print up business cards, there will be a scythe and a pen on the top right hand corner. But to the geek in me, that's not enough. I plan to have the scythe and pen somewhere on the circuit boards I produce. If I ever design a photomask for an integrated circuit it will be signed with my personal seal. The Zippo is the first of what will be many such experiments in creativity.
Why a Zippo lighter? I was a boyscout. The two things I took from my years of tying knots in the church basement were a psychotic need to be prepared and a certain strange love of fire. Having a lighter on hand fills both requirements. I don't smoke, but the knowledge that I have a box that can create light and warmth with me is reassuring. A Zippo because I'm fascinated by concepts that predate me. The Zippo of today is exactly the same as the one I inherited from my grandfather, and functionally identical to the first ones made three quarters of a century ago. Fill with naphtha, click to open, strike the flint and you have a portable flame. This particular Zippo was purchased by myself as a sort of a present for doing well in school, and replaced the previous Zippo (that was purchased for the same reason), which vanished mysteriously after four years of loyal service.
Why electrolytic etching? I stumbled upon Von Slatt's brass etching page via the Make blog and the idea of etching the scythe and pen into my lighter immediately jumped at me. After a bit of research and experiments, I was determined to do it. This is one of my few projects that is entirely useless, but like all of my projects, it's educational, and I will use the experience I gained doing this once I start working on making circuit boards.
Enough with the exposition; onward to technical matters. My procedure was relatively similar to the one described on Von Slatt's site, but with a few challenges. The brass plates Von Slatt etched were a good deal larger than the Zippo, and lacked the hinge on the side. Taking a bite out of the hinge would make opening and closing the lighter impossible, and whereas Von Slatt was content to etch the sides and back of his plates, leaving a raised impression of his images, I wanted to have my seal sunk into the lighter.
The basic idea behind the project is to use electrolytic etching, which is effectively electroplating in reverse, to engrave the image onto the lighter. We need to selectively etch only the parts of the lighter that make up the image, and to do that we need to block the process with an "etch resist". For the main image, I used laser toner transfered to the lighter via a clothing iron, and for the reminder of the lighter I used wax. The etching was done in a solution of cupric sulfate with a modified PC power supply, and took about fifteen minutes.
Parts needed:
Things I wish I had:
The first (and most difficult) step was to get the image onto the lighter. This is done by printing the image onto some glossy paper with a laser printer, pressing the paper onto the surface, and melting the toner onto the surface with a clothing iron. Printing it is fairly easy. The image is saved as an SVG, so scaling it is trivial. I just opened it in InkScape, altered it's size to fit the measurements I needed, and printed.
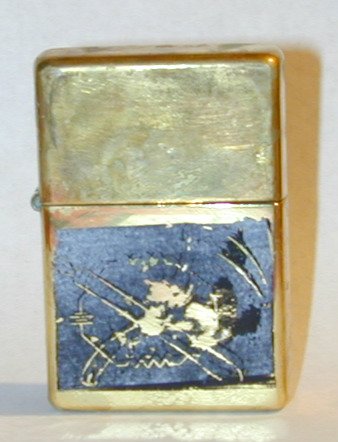
Transferring the toner proved to be more difficult. The first several attempt ended with only a small amount of the toner being attached and the rest coming off with the lightest pressure:
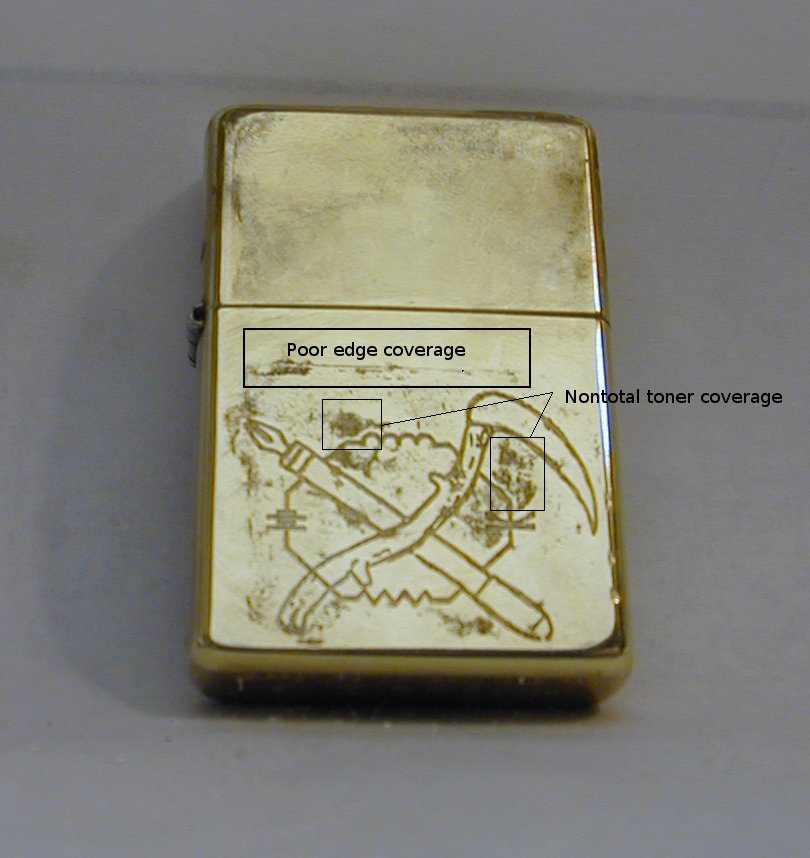
I tried various temperatures, pressures and soak times, before determining that the problem was the paper. Replacing the generic "multipurpose" gloss paper with the Staples Photo Basic Gloss made the process much smoother. It took me a few more tries to perfect the process, and the final result looked like this:
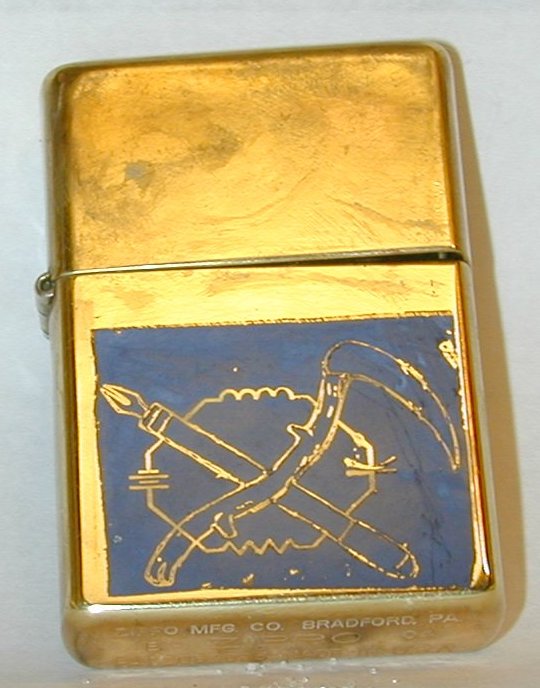
There were a few bare patches and sketchy arias that I touched up with permanent marker. This is the 5th attempt with the new paper, and I decided that it was good enough.
Before each transfer attempt, I would clean the previous attempt with acetone, do a quick polish with Brasso, and then a final clean with Zippo lighter fluid. Be careful not to touch the polished aria or the toner on the transfer sheets, as the skin's oils can mess up the transfer. I used my utility knife to remove the transfer sheet from the rest of the paper, and found that it worked best if I cut into the toner-covered arias slightly and left a wing on one side to grip it by. Cutting into the toner aria means that there's toner at the edge of the sheet. If the edge is visibly not attached, that means that there's more work to do.
To actually transfer the toner from the sheet to the Zippo, I used a clothing iron on the highest setting with no water in the reservoir. I placed carefully placed the sheet on the lighter, and pressed down until the toner has remelted and fused with the surface of the lighter. After a few experiments, I found the best method was to keep the lighter insert of the Zippo in the shell to provide support, and keeping the lighter perfectly still to prevent the pressure from moving it around. I have a bench vise with rubber calipers that was perfect for the job. Placement of the transfer sheet is critical. I got a good idea of where the image will go by holding it at an angle to the lighter's surface and going by the reflection. After that, I had to be careful not to disturb it, which was tricky when putting the iron down. A shaky hand or carelessly mashing the iron would either move the transfer sheet and get a skewed image, or would slide the sheet in the middle of transferring, resulting in a double image. Some people recommend heating the corner with the tip of the iron, but I couldn't keep the iron steady enough to do that successfully. A drop of super glue at one corner may have worked, but I didn't try that.
I started by pressing down hard on the sheet for about 30 seconds, with the entire sheet under a flat part of the iron. After this the paper is firmly stuck to the lighter. Next, I pressed the tip of the iron to part of the edge of the sheet for about 10 seconds, using light pressure and keeping the iron flat against the sheet. I did this all along the edge, with a bit of overlap, until all of the edges were flat against the lighter. Once this is done, I water about thirty seconds and placed the lighter into a bowl of warm water. The wait will ensure the toner has resolidified and prevent water from getting under the sheet and causing bubbles.
I let the lighter to soak for 10 minutes, at which time I removed the lighter, and carefully peeled off the paper. Some stuck, but almost all of it came off on the first try. I dunked it back in the water for another thirty seconds, and rubbed it (while still under water) firmly with my thumb. If toner came off, that means I didn't heat that aria enough, and it's time to redo from the start. I would remove the toner with acetone (while wearing gloves), and try again. When it finally stuck, I rubbed until most of the paper was gone, and then used a tooth brush to remove any paper that's in hard to reach arias. As I mentioned above, the rough arias were touched up with a sharpie, although this didn't work as well as I had hoped. If I had a steady hand, I believe acrylic paint would have worked, but I haven't tried this, so I can't vouch for it.
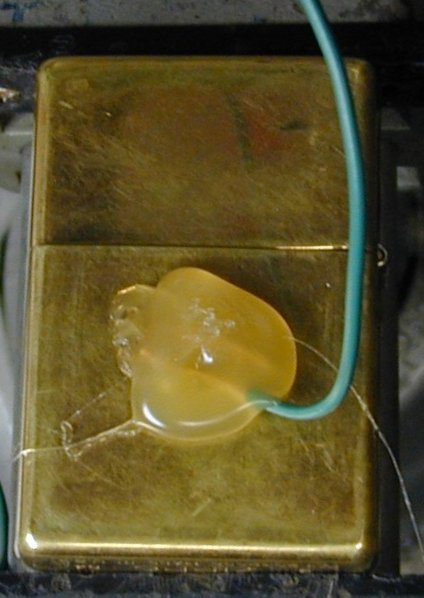
The next step is to prevent the rest of the lighter from being etched. I used standard paraffin wax to coat the lighter. Before I did this I needed to attach a wire to the lighter to allow current to flow through it. I used a short lead of 28 gauge wire hot melt glued to the back, making sure to test the continuity to make sure the wire is actually touching the lighter.
I personally removed the insert for the next steps. It may have been better to leave it in, as it will help keep the lid closed and would weigh it down for submersion, but I decided to remove it. I put a dab of hot melt glue on the hinge to prevent it from opening during the wax bath, and ran a bead around the crack of the lid to prevent wax from getting in, as that would be nontrivial to clean out.
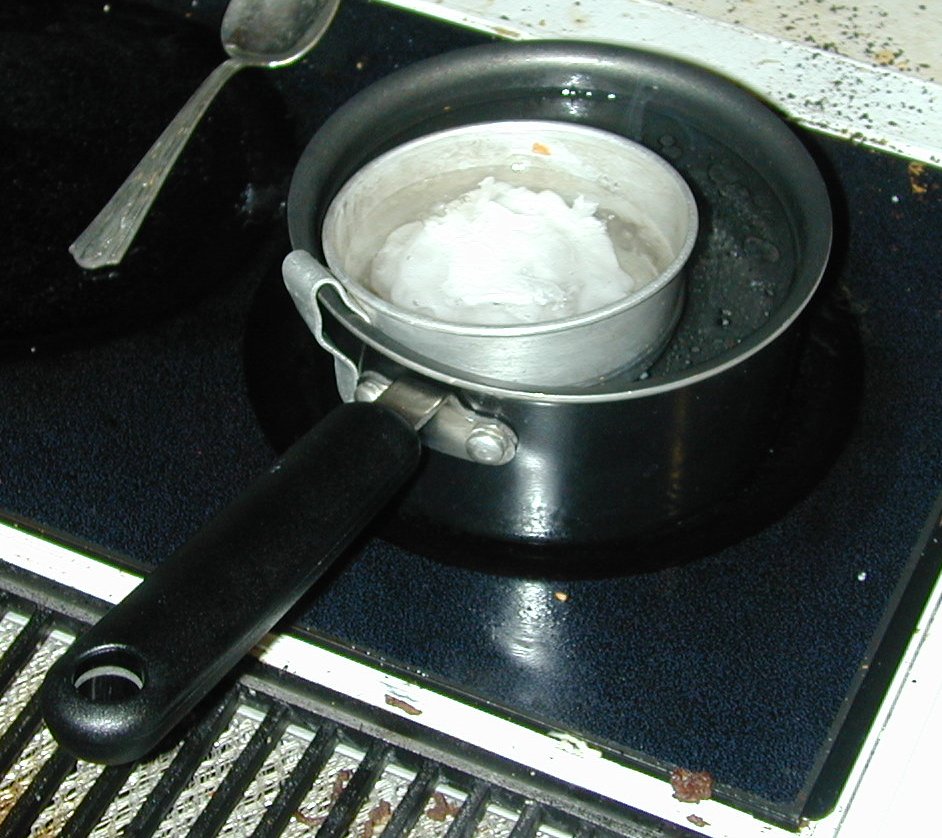
I chose wax to protect the remainder of the lighter as it was non conductive, good at sealing (hence the term 'sealing wax') and easy to remove. WARNING: When melting the wax, under no condition do you apply heat directly to the wax. This is dangerous and stupid even for an HoA labs project, because it can catch on fire and burn your house down. I wished to avoid this as the house contains much of my stuff, much of my friends stuff, a few of my friends, and most importantly, it would allow my room mate Jason to say "I told you so". The best way to melt wax is using a double boiler, which means simply put the wax in a bowl and put the bowl in a pot of hot water. The double boiler guarantees that the wax will not become hotter than the water, and the water can't go over one hundred degrees Fahrenheit while boiling. Mine was a simple aluminum camp cup in one of the sauce pans on the stove on medium heat. The temperature of the water doesn't have to be too great, as the melting point of wax is about fifty three degrees Fahrenheit.
Once the wax is melted, I dunked the lighter into the bath followed by a quick dump in cold water to solidify the wax. I did this until there was about a millimeter of wax all over. The only aria that had any trouble taking the wax was where the wire came out, and a few extra dunks solved that to my satisfaction. Now that this is done, I can move on to the most important step: etching.
There are many chemicals that can be used to etch metal. Salt water is one of the simplest, and can etch the widest variety, but I used copper sulfate as it is likely to give more even results. The greenart page on bordeaux etching has a good deal of information on the process, as well as disposal of the chemicals. Supposedly, various herbicides use this, but after a search of all of the plant supply stores in the immediate aria, as well as searching the net, I couldn't find anything that had a significant amount of copper sulfate. All of the sites selling bordeaux mixture actually sold a "replacement for bordeaux mixture" of uncertain composition. I ended up going the route of a chemical supply company, which is a more expensive, but more reliable, option. I dissolved the full thirty milligrams into about two and a half cups of water easily. I could have added more if I had some, or used less water, but this quantity worked well enough.
The etch process works like the reverse of the electroplating process. Instead of adding material to the workpiece, we want to remove the material. To do this, attach the positive terminal of a DC source to the workpiece, and have the negative terminal attached to a conductive plate with enough surface aria to hold all of the material removed. The closer the negative and positive pieces are together, the faster the etch. The more current flowing through the system, the faster the etch. This can be good and bad, as too fast an etch may eat all the way through the plate, which was not something I wanted.
In this project, for the negative plate, I stripped off the insulation from about a meter of of 28 gauge wire and coiled it up so it would fit in the tank. This provided ample surface aria for the material from the lighter, as the aria to be etched on the lighter was quite small. I supplied the power with a modified ATX supply. This supply offered up to 9 amps at 12 volts, which is more than enough. Knowing that ATX manufacturers tend to overstate the power supplies capacity, I decided to limit the current to 6 amps. Via Ohm's and Watt's laws, 12 volts/6 amps = 2 Ohms, and 12 volts times 6 amps equals 72 watts. I was lucky enough to have a 2 Ohm resistor that had about five times the wattage rating, so I didn't have to resort to massively parallel 5 watt resistors. This totally neglects the resistance of the etch system, but I didn't feel like blowing the fuse in my supply so I decided to err far on the side of caution.
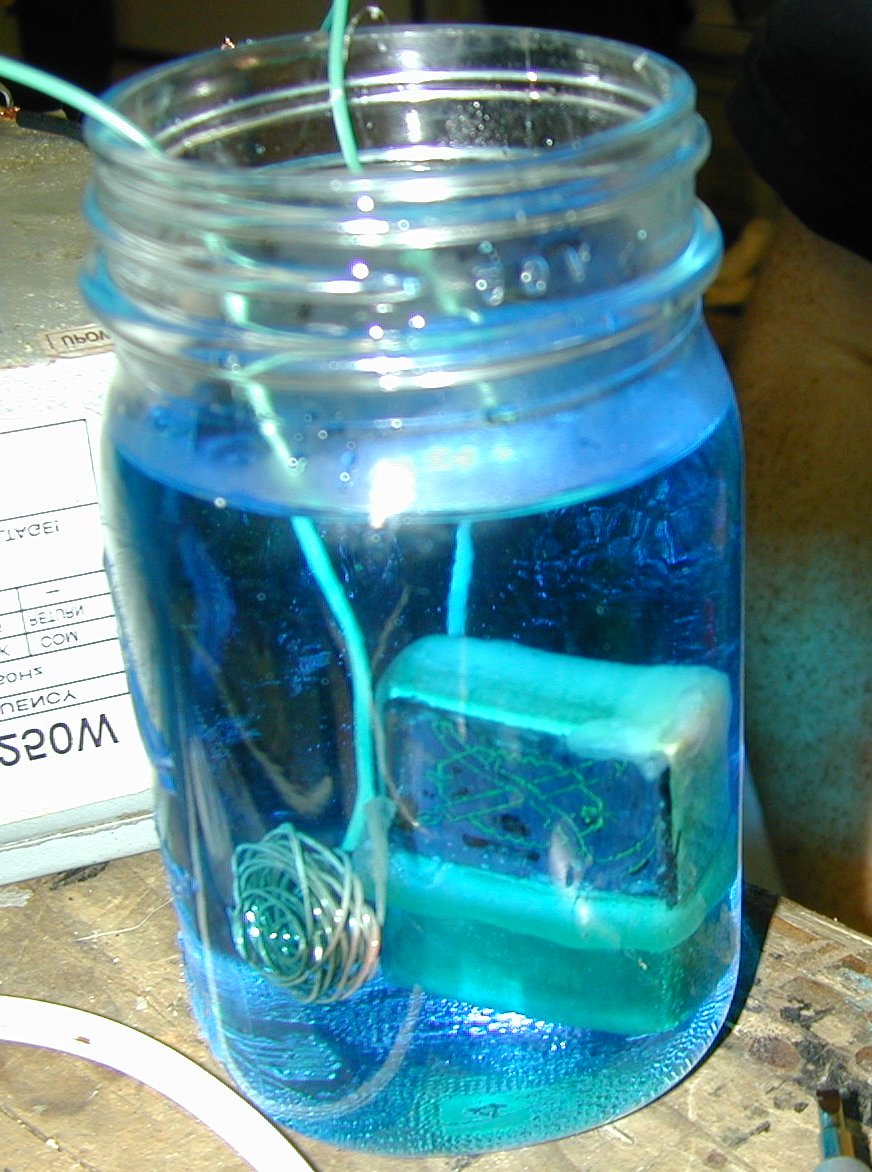
Below: The etch set. The green cylinder is the resistor, the silver box is the power supply, on top of which is the wax coated lighter. The blue jar is the etch tank.

I used an old mason jar for an etch tank as it was glass and I could seal it to keep the solution for future use. I carefully placed the sealed lighter and the coil of wire into the tank and plugged the power supply in. The voltage across the resistor was 5vdc, giving 2.5 amps via Ohms law, and the etch set an effective resistance of 2.8 Ohms. I could have removed the resistor and I should have been safe, but I decided to keep it to prevent full shorts if the plates touch and to act as a shunt so I could monitor the progress. I didn't see any bubbles form, but if I looked close enough, I could see a precipitate forming on the wires on the negative side of the system. After about five minutes, I removed the lighter and cleaned off the brown scale that was forming on the pattern. This also wiped off the sharpie marks, which I reapplied. I dunked it in and cleaned it off two more times before decided that the pattern was etched deeply enough.
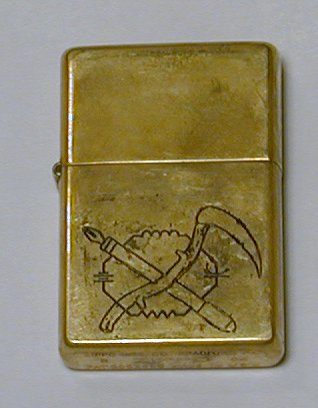
Cleaning was easy. I dunked it in water to get the copper sulfate solution off, then peeled off the wax and glue, finishing by removing the toner with acetone and giving the whole Zippo a once-over with Brasso. The results weren't perfect, but I'd call the experiment a success. The arias that were protected by permanent marker showed some byte as can be see below, and the edges of the image weren't protected, but the remainder of the lighter showed no wear and it still functions flawlessly.
If I were to do this again, the only major change I would do would be to get a better etch resist than sharpie for touch ups. I might up the current through the solution, but it worked fast enough for my tastes. I would also place the pattern higher on the lighter and have the toner cover a larger aria outside of the immediate pattern for additional protection. I also would have reversed the image, so the scythe was pointing in the right direction, but that's not all that essential.
I wasn't entirely satisfied with the contrast of the lighter after the polished surface tarnished (as brass in contact with flesh inevitably does). The solution to this was to paint inside the etched pattern. I masked all of the arias around the pattern with electrical tape, and cut out small squares of tape to cover some of the rough arias where the etch mask wasn't perfect. I then sprayed the lighter with black rustoleum, not because of any protective qualities, but because I happened to have a can of it. After allowing the paint to dry, I used sandpaper to clean it off of the top surface, and the final result is below:
The best part about this project is I now have an easy way to show people my hobby. "I make things" followed by "mostly keyboards and miscellaneous circuits" only goes so far, whereas now all I have to do is toss them the Zippo. There's something to be said about making something that you can carry around with you everywhere. Of course, I'll loose it (inevitably), but until then, it rides in my pocket.
If you wish to comment on this mod, either send me an email at p@ohbah.com, or post on the official Second Page Media topic for this project.
Return to index.


All works on this page is copyright 2007 Patrick Tait. Some rights reserved: 